Wednesday, May 28, 2014

{ Chase's Empty Room }


Do you guys remember this room? 


 If you are completely confused or just here for the first time, this is the bedroom that we are going to make into the nursery for our little guy. Looking back, I don't think I've shared this room before other than maybe a few shots of the hardwood floors in there. 

All that stuff was from the previous owner. After we cleared it all out and scrubbed it all down we were left with this


It was a mess. There were A LOT of holes that needed to be patched and lots of trim that needed paint. You can see in the photos above that some of the trim had already been painted. I painted the ceiling first and then started painting the walls. I picked out a dark blue that has some gray undertones for the walls. I decided to use the blue on the two window walls and then a cream color for the other walls. 

The room also had the laundry hook up installed for the previous owner. We had to take out the the stuff in the wall and fix those spots too but the holes in the floor will just have to stay put. I will probably just throw a dresser or something over it so it wont be seen. 


I started cutting in the blue color and my mom started the cream color over on the other wall


Here's my sweet mom 


{ Note to self- do NOT stand on a bucket while painting. I did and fell. Stupid. My knee still has a bruise. Use a ladder- always. }

So here is the painted room with freshly re-finished floors. It feels SO much better in here. It's amazing how much paint can change a room. 


The closet got two coats of paint too.


I got this rug on overstock.com. I really like the design and I think it should fit the decor of the room pretty good.


This is as far as we got in here so far. I moved the pack-n-play in so Chase could take a nap in there the other day and I took a photo of course to capture his first time sleeping in his room. 


I am looking forward to getting things up on the wall and put his nursery furniture in here. I've got a few things for the wall including a custom painting from an Etsy shop that I am really excited to show you. 

We are still not moved in completely but we DID spend the night here last week. It's looking like hopefully by this weekend we can do a few more projects and then be IN. It's going to be crazy around here with all of our stuff. Seriously, how did we accumulate all this stuff. Stay tuned for a garage sale very soon too. You all NEED to come. I'm not joking- we need to minimize and get rid of a lot!


Thursday, May 22, 2014

{ House Crash - Check out Kelly's beautiful home! }

I'm slightly addicted to reading blogs. Yes I said addicted and if you know me then you know that 50% or more of my conversations start with..."so I was reading this blog...". I love seeing what other people are doing in their homes and I get sucked in when I find a good one. I have a few that I faithfully read and one of those is www.viewalongtheway.com/. Kelly's house is amazing. Her decorating style is something to be admired and since I am still trying to figure out what my "syle" really is (seriously, I dont have a clue yet), I love getting inspiration from her home.

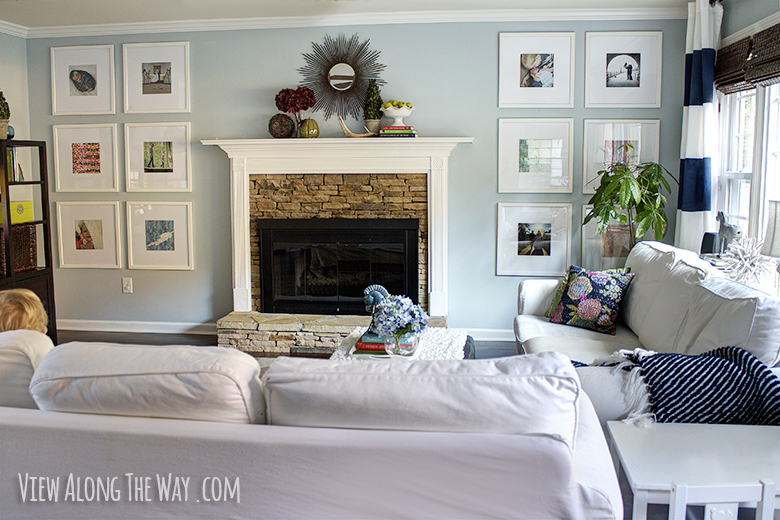
I really like how cozy her living room is. The color combinations with navy and white plus all her other decor feel very "come and sit in here and relax" to me. This is how I want my home to feel.

Grid of oversized DIY picture frames! (And lots of great art ideas!)


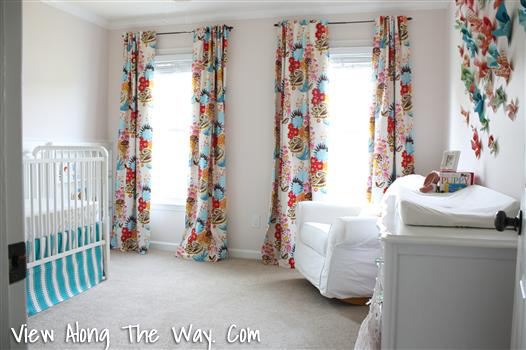
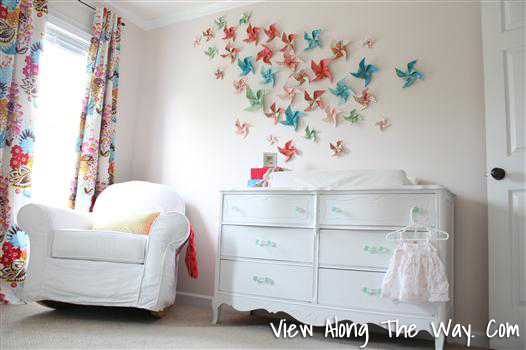
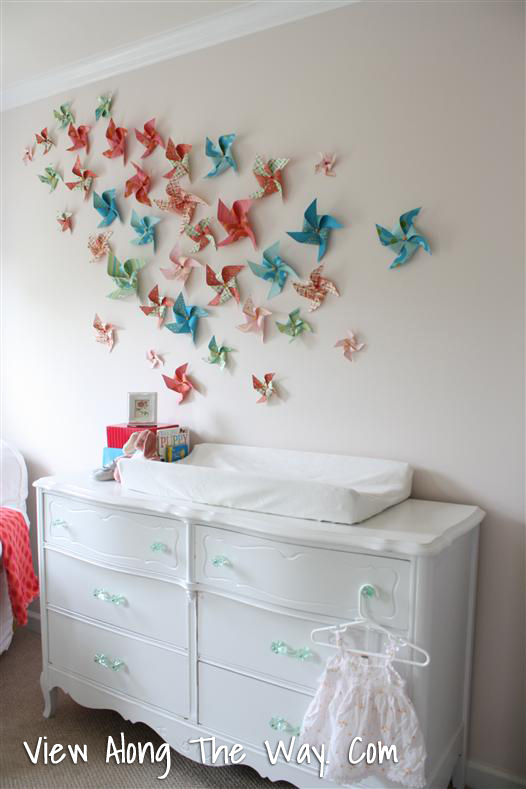
I fell in love with her nursery too. You can see her whole post here. The colors are adorable and I swoon over the pinwheel wall. And how awesome are those curtains?!


Kelly has tutorials on a lot of her DIY projects for this room and more so if you click here that will take you to them.

You've got to check out her blog and see the rest of her beautifully decorated home. Thanks Kelly for letting me share your home today!

Don't forget, if you or someone you know has a home that just screams "show me off!" then let me know and maybe your home will make the House Crash series right here on therawhouseproject blog!

Tuesday, May 20, 2014

{ Living Room Paint }

The living room FINALLY has painted walls.


I was a little skeptical at first when I was cutting it in because it was a lot darker than I was thinking I wanted to go for this room but now that it's been on the walls for a couple days I am really starting to like it.

The color is one shade darker than the kitchen and the thing that I really like about it is that it appears to be a different color at different times of day. The photo above was taken at night and it looks like a dark gray in this light. In the day time it looks more green-ish gray. Sometimes it looks dark beige too. I really like the changes of the color. So as I show you a few of these pics you will see that the color appears very different in some of them. 


My sister and I painted the trim around the window in the living room and the trim around the front door was just done recently too. 


We had red resin paper covering the floor and pulled that all up last week so we could have Michael, owner of Woodsman flooring come and do one more coat of polyurethane.


Before I show you a few pictures of the floors, I have to say, when we pulled up the resin paper we had attached it with painters tape that was the cheap white tape and it did NOT come up nicely. We crawled around on our hands and knees and had to use WD40 to get it off. 


We've used a lot of painters tape over the last 8 months of renovation and I have to recommend that if you need to use painters tape do NOT use the cheap stuff. The white or the blue tape both stick horribly. The blue tape pealed up the paint and some of the drywall around my upper cabinets. NOT COOL.The green pricey stuff works the best. I've never had a problem with it pealing off paint, or sticking to anything. Just my opinion and from experience I wanted to share my thoughts with you. 

Back to the floors...They are shining beautifully!


We had to let it sit for a couple days but now the floors are all ready to have furniture moved in. That will be happening very slowly over this week. We are really excited to be getting into our house. It will make working on things a lot easier to be able to lay the kids down for naps or bedtime and work. I cant even describe how amazing it will be to be all together again for a dinner around our table. 


Thursday, May 15, 2014

{ Marble or is it... }

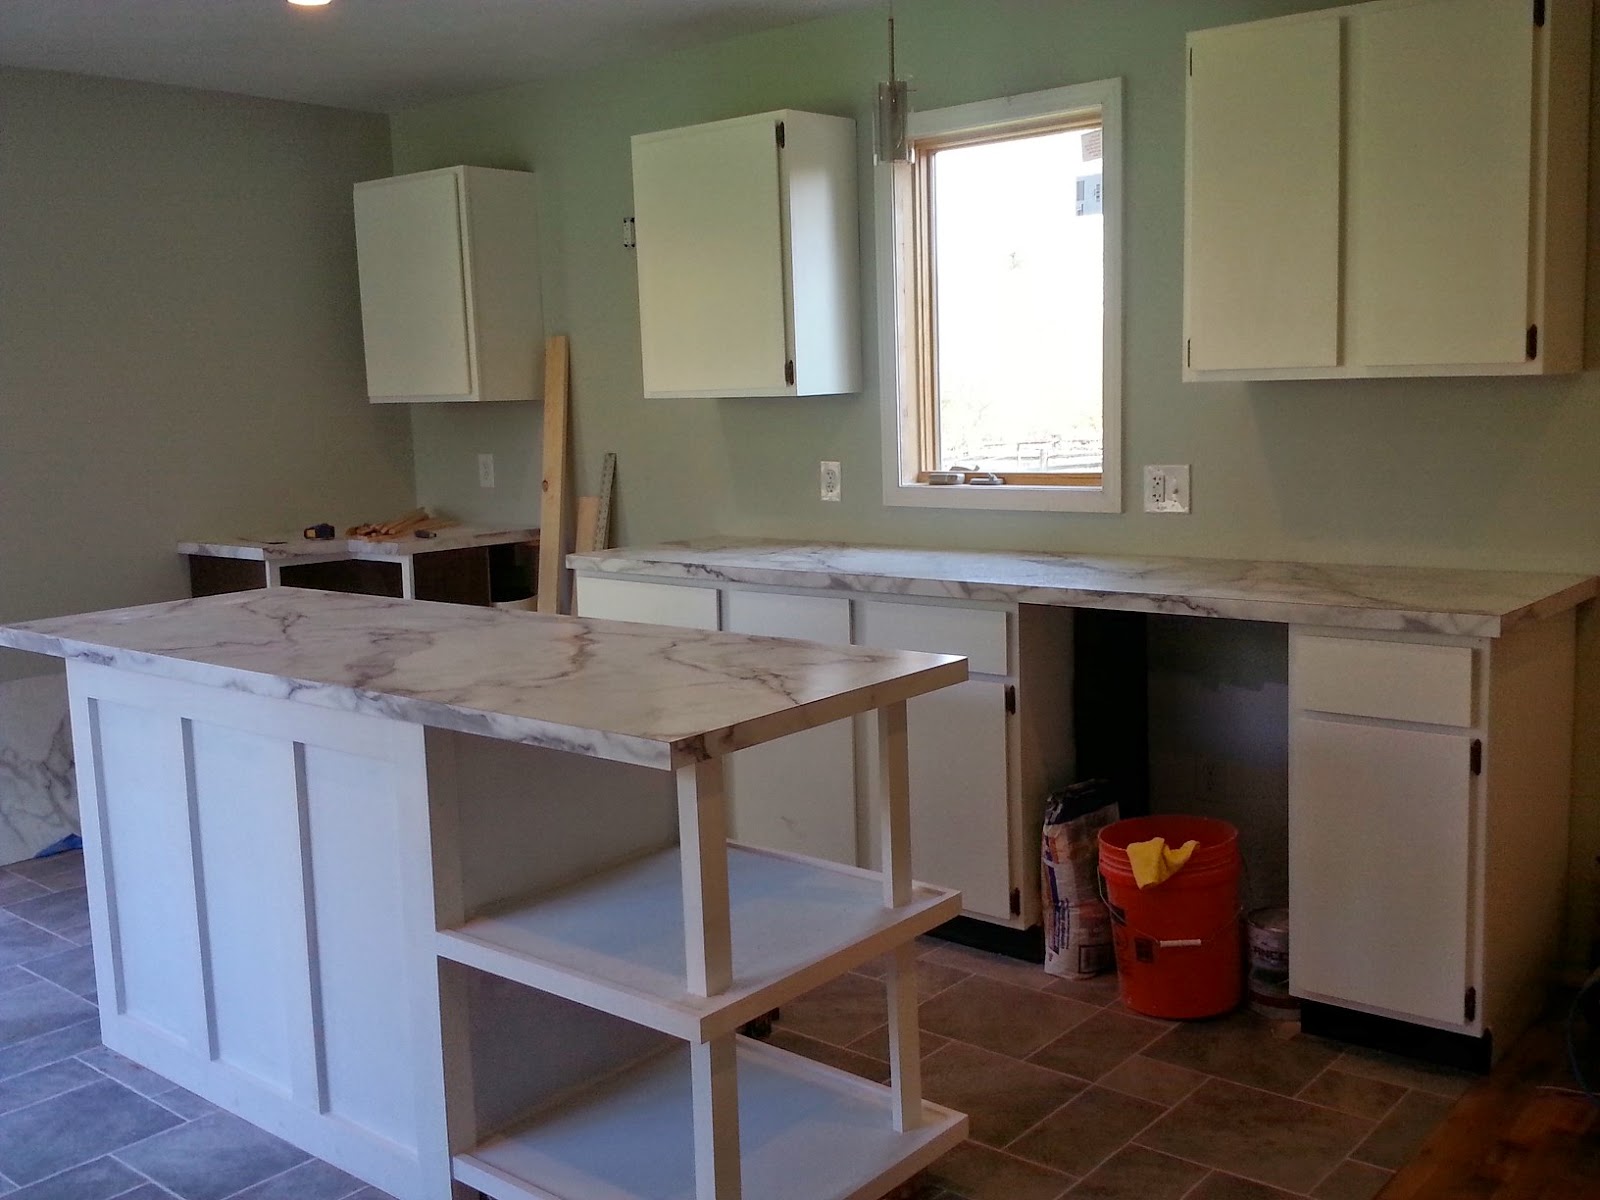
Guess what? The counter tops are IN!! 
My dad and Mark worked on these all day on Saturday. I was painting so every once in awhile I would sneak in for a peak at the progress and snap a picture and probably annoyed them with my freak out every time I walked in. Not a bad freak out, like a OH MY GOSH I AM IN LOVE freak out haha! I know I get a little too excited when it comes to things getting finished over here but hey that's just how I am!


Don't they look great?! I call this my faux-marble counter tops. Did it fool you? Were you thinking it looks like marble? It's actually laminate. Maybe you know your marble better than me but I could be fooled, I think they look like the real deal. 

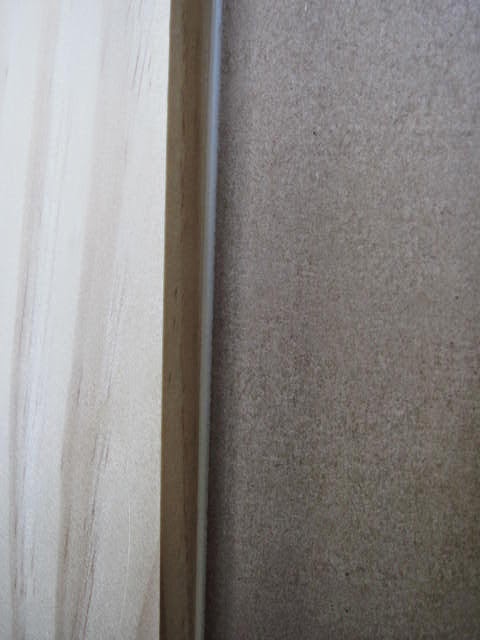
Here's a close up of the finish


When I started looking at counter top choices I happened to see this website and I really liked the look of the Calacatta Marble. I googled it to see if anyone had it in their kitchen out on the internet so I could see what it would look like and came upon this girls kitchen and I was sold. I loved it. I was really happy with my laminate counter tops at our previous house so I know I will love these ones. 

We ordered ours from Lowe's. We were in luck that day too because they quoted us a much cheaper price than what it actually was so when we went to pay for it we asked why it was so much more expensive than what they had quoted us. It ended up being a mistake on their part but they gave us the quoted price which saved a lot of money for us. Thank you Lowe's! We are really loving Lowe's right now. Of all the home improvement stores that we've dealt with through this whole renovation, I have to say that Lowe's has been the best to deal with when it comes to ordering, pick up, and returns. They are not paying me to say that either, I really just like that store!

We ordered two sheets because it only comes in certain sizes so we have enough left over to do some counter tops down in the basement laundry room eventually.

It comes all rolled up


Here it is after Mark unrolled it


Even though we did laminate counter tops in our first house, I don't remember being there when they were installed. It was actually a pretty interesting process to watch. I thought it looked really difficult but Mark said it was really easy. From what I saw, it didn't look easy but I guess when you know what you're doing then it's not as hard as it appears. 

My dad is an amazing carpenter and does this kind of stuff for a living so it's always great to have him around to help out when he can. First Mark cut out all the pieces. They do the side pieces first and then the tops so here are the sides all cut out and ready to go. 


They used a sprayer to apply the adhesive glue. It gets really tacky after only a few minutes so they have to work quick while being extremely precise.


When they did the top piece they placed small pieces of wood a few inches apart down first. Then they placed the large piece of laminate on top of that. They started at one end and slowly took out a piece at a time while making sure the laminate was placed where it needed to be. 


The whole space around the counter and the island were covered with that red resin paper to prevent any of the glue from getting on it. 

I couldn't rip that red paper off quick enough so I could see it all put together with the white cabinets. The island still needs paint but I would say it's looking amazing so far!


Up next was cutting out the piece for the kitchen sink. We got this sink for a crazy discount. It was right time, right place kinda thing. Lowe's clearanced this sink out because it was the last one on the shelf literally seconds prior to us looking down that aisle. The salesman told us about it and we snagged it. 


So in it went


It looks really great. We still need to pick out a faucet yet. Hopefully I can make it into the store tomorrow sometime and then we will finally have a working kitchen sink! 

The changes in this room are amazing and it really is starting to feel like home. 


We are really hoping to have the appliances moved in over the weekend too so stay tuned for that. What do you guys think about the counters?!


Sunday, May 11, 2014

{ Painted Twin Beds }

About a year ago I found two identical twin beds listed on craigslist and I snatched them up! We've had them in storage and I was so excited to get them out once the carpet was in upstairs so I could see them all set up in the kids' room. 

I love that they are simple with clean lines. The box springs came with the purchase and I didnt plan on taking them but when I pulled up to the house that I was buying them from and saw how great of shape they were in, I had them load those in too. 


Aren't they cute?! I thought they would be even cuter painted so I went for it. I've painted a few pieces of furniture before but by no means am I good at it. I skipped over priming them which I will probably pay for someday when the paint chips away easily. I'll let you know how that goes as they get used.

I stopped at the new Sherwin Williams store and picked up one of these little quart pots. They cost under $10, plus this is one of the colors I used for the accent wall and there's still a ton left in there for future use. I had them color match it so if anyone is interested in the color here is the formula.


I put a large tarp down on the carpet, pulled the box springs off and went to town painting them. I used a paint brush for everything and then rolled out the sides later realizing that I FORGOT to paint them. I'm such a dork!


After it dried I brushed on a top coat using this stuff


This clear top coat makes the finish feel much smoother and it shines it up a bit too. I only did one coat but I may still go back over them and brush on another coat for extra protection. 

They look so great up there. It's exactly what I was going for in this room. The kids are really excited about their new beds and cant wait till we purchase some mattresses so they can actually sleep on them. They were running around acting all excited about the beds so I had them stop and told them to pose by the beds. Apparently the little guy thought I said strike a pose! He cracks me up!


I know painted furniture is kinda the cool kid thing right now and I am all in. I really liked the beds before but the painted versions are so much more fun! I will be painting a book shelf and TV stand here very soon too so if you have any tips for me I would love to hear from your experiences. I know next time I wont be skipping the priming step but all in all I think this little project was pretty painless and turned out great results!

What are you guys painting now that spring is here and we can paint outside or in the garage and not freeze our buns off doing it! Aren't you LOVING this beautiful weather we are having, I know we are!


Thursday, May 8, 2014

{ Getting an Island }

No, we didn't buy a piece of land surrounded by water...we are talking about the KITCHEN island today and I am SO excited to show you whats going on now that I FINALLY found all my pictures (yay for smart techy people). Remember WAY back like f.o.r.e.v.e.r ago when the kitchen looked like this?


If you are just reading for the first time let me explain...all that stuff is NOT ours. It was the previous owners and these pics were taken prior to us purchasing the house. I didn't get some good photos of the room all cleaned out before we started ripping it all apart but as you can see it had dark cabinets, a dark orange ceiling, dated flooring, dated counter tops, dated lighting, and whole lot of really pretty curtains, you agree? ;)

Mark has done SO much work in this room. You can read all about those changes here and here.

So back to the main reason why I am sharing the kitchen with you today... the island. We started out by putting two of the base cabinets into the middle of the room. We knew from the beginning that we were going to re-work the layout of the cabinets and I really wanted an island. It's going to be tight in there once we get the table in but I don't really care as long as I have the island.


 I wasn't sure how I wanted to trim it out but then I saw this on pinterest 

like the shelves on the island
Original source not found. See on my Pinterest board here.
I sent the photo to Mark and when I got to the house THAT NIGHT he had this completed


What the heck! It took a minute for my jaw to be off the floor. I was literally like, "wow Mark, I had no idea that you were going to make my inspiration picture into reality on the SAME day that I sent you the photo!" Then a whole lot of squealing went on too (of course). 

It is gorgeous! Absolutely exactly what I was envisioning. I started filling in the nail holes the next day with paintable caulk. 


I've never used a caulk gun before. That photo above was Marks caulk line after he gave me a little tutorial. Here's what my line looked like...


Ya, not good. Lets just say, a whole lot of sanding was in my future.

After a million hours of sanding (that may be a slight exaggeration) I was able to get the first coat of primer on


Did you also notice in some of those photos that the cabinet door are back on. I still have to do a light sanding on each of them and a last coat of paint and then get the pulls on. 


I am going to be painting the island over the weekend and then the kitchen cupboards should be all done. Later down the road, I would really like to get new cabinet doors in a more modern style but for now, until we can save up, we will be working with what we have and I am pretty happy with how they look.

We picked up the sink and counter tops yesterday and hopefully those can all get done over the next couple of days. Things are really starting to come together and we are so excited to wrap things up in here. We plan to move in very soon and continue to work away at things that we want to get done as we live there. Exciting things happening here!!