Friday, October 31, 2014

{ Crafting With Friends }

My kids LOVE to do crafts. I meant to share this post with you all a while back and not sure why it never got out there but I thought, since I've been literally sleeping every.single.second I can get due to having bronchitis and an upper respiratory infection and coughing non-stinkin-stop, I would show you a few crafts we did over the summer since I've got nothing else prepared to show you yet when it comes to our recent house projects.
I love to do crafts with them too but is it just me but so many "kid craft project" are more like "mom does all the work and the kids sit and watch projects". Maybe it's just me. I love when I come across a craft that when I lay out all the necessary items the kids can just go to town and I don't have to be standing over their shoulder practically doing the whole thing myself.
One thing my kids love to do is paint. I let them paint almost every day that I am home. They love doing it, paint is relatively inexpensive, paper is cheap and the hour long painting project is a perfect distraction for the kids so I can get some much needed work done around the house. It gets even better when friends are involved.


Then we did a craft last week, that I've done before, and would say it's one of those mom does more of the work than the kids BUT the outcome is fun so I still will do this one on occasion.

 We call these silly hats...


They wore their hats (crowns is what the kids called them) for about two hours around the house after making them! They played kings and queens and princess and had so much fun!

These are easy to assemble and most of the items are typical craft items that you probably already have stashed away...or at least I do #craftinghoarder


Items you need:
Duck tape (so many fun patterns at Meijers or any craft store)
Straws
Pipe cleaners
Pencil
Scissors (not pictured)

You can measure the circumference of the child's head and then cut the tape to that length and lay it sticky side up on the counter. Obviously this is the mom part since the tape would all be stuck to the kids head and stuck to itself if the child did it themselves. That wouldn't be pretty.


Have the child pick out a few (really doesn't matter how many) of their favorite colored straws. Mine were the bendy straws so I just cut off that part. Stick the straws onto the sticky side.

After that you take another piece of tape the same length as before and lay it directly on top of the other piece so both sticky sides are now together with the straws in between the layers.


Have the kids wrap the top of the pipe cleaners around a pencil so they get curly and stick them into the straws. Wrap around the child's head and stick another small piece of tape on to hold it in place. Now enjoy!


I made these for the kids for Halloween a couple years ago too and they were a big hit.
Instead of using straws, I used black paper strips for the legs and round paper cut outs for the eyes. He loved this hat!


Sometimes it's worth doing some of the work so the kids can have a fun time playing with their new "toy" once they are done!

Tonight we are planning on having a few friends over for a small Halloween get together after we make a quick trip to the school trick-r-treat walk-through to pick up some candy. We probably wont go outside too much tonight since I've been sick plus it's snowing here already. dun.dun.dun. I'm excited to spend time with our friends tonight, we plan to snack, have a kids dance party (maybe us adults will get in on the dancing too), and let the kids paint up some funky looking gourds. It should be fun. Or maybe a paint disaster, but I bought washable paint, so we should be good. All in all thankful that it's finally Friday, and the weekend should be full of house projects and family time which is totally good with me!
 

Wednesday, October 22, 2014

{ Fall Leaves + Color Washing }

 
For the past two weeks we have literally spent most of our free time raking leaves. Do you guys have this problem this time of year too? I guess I never really had to deal with leaves growing up because I lived in town and we had like two trees in our yard and most of the leaves would be raked up in a matter of a weekend. Then when we built our first house back in 2005, we didn't have very many tree's in the mowed yard portion of our property. So this house has been quite the adjustment for us.


We have - in just the mowed portion of our property - at least 10 trees. Ten trees that seem to have endless leaves falling every.single.day. into our yard. One of those trees being in the very front of our house and dropping around 2 truck bed full loads daily ha!


They are beautiful. It's been (kinda) fun raking with the kids each night BUT I decided though for next year we need one of those behind the mower pick-er-upper things. You know those things right?! ;)

If you have one that you want to sell, email me. Seriously. No, Seriously!

So while the leaves are taking up all of our time these days, I did manage to squeeze in a few small projects last week.

One was making homemade applesauce. The second project was color washing some barn wood to put hooks on for coat hanging.

I'm going to share my color washing project with you because it's quick! Have you guys color washed before? If you've heard of white washing, it's the same concept, and can be done other colors, not just white.

Basically you take a paint color - mix it with a small amount of water, and paint it on wood. This gives the wood the color but yet you still see the grain behind it. Unlike just painting the wood that completely covers up the grain.


Here's how I did mine. I used an old sock, a cup of water, a paint brush (not pictured-obviously) and black chalk board paint.

You don't need to use chalk board paint, it's just the only black paint I had on hand so I decided to use it since black was the color I was going for.

This is what the wood looked like after Mark put it through the wood planer and before I color washed it.

 
I set it up downstairs to paint.
I dipped my sock in the water cup then dabbed the sock onto the top of the paint can to get a little color on the sock.

 
I put little paint on the paint brush and brushed it on the board in one quick swipe and then rubbed my water and color sock all over the board spreading the paint around. I dipped the sock into the water again when it started to feel like it was drying out.  
 
It looks a lot like stain. It gives the board a deep color in all the nooks and crannies and a lighter color on the surface. Showing off all the character while still adding color to the wood.

 
I only did one of the long sides and the edges since we will be hanging these up on the wall. The hooks are on and the wall is being painted this week. Once the paint is dry we will have these beauty's up so we can hang some coats. Which we DESPERATELY need coat hanging space. Currently there isn't a solution for coats by our entry and now that cold weather is here we need something!
 
You can see the difference between the color washed board to the left and the pre-color board on the right below. Looks like stain, doesn't it? It's actually really beautiful and I'm glad I tried this method of painting instead of just flat out painting the boards black!
 
 
 Here are a couple other examples of color washing that other people have done. I really like this way of painting wood - and bonus it was REALLY REALLY easy and quick to do.
 
Beijing Modern Bedroom/Remodelista
 
Yellow Ombre Wallpaper Remodelista
 
How cool are those rooms? I'm excited to show you the done project. Hopefully by next week but who knows... maybe we'll be buried under leaves never to be found again!

Back to the apple sauce making...I want to try one other way of doing homemade applesauce, so after I do that I'll share my thoughts on the easiest way - in my opinion - to make it. What are your tried and true ways of doing applesauce?? I would love to hear any tips and tricks. This is my first attempt at it, so help a newbie out!


Wednesday, October 15, 2014

{ Chalk Boards + Barn Wood Table }

 
I decided to paint the inside of our pantry door with chalk paint. I did that when we were painting the cabinets at the beginning of this year and then it sat.
 
 Until the other day when I decided it was time to do something with it after being inspired after a mindless pinterest binge.
 
 
So here's the outside of the pantry. It sits next to right of the fridge and is completely unorganized on the inside. Everything just keeps getting pushed to the back to stuff the new goods in. I really need to start organizing but come on now... who wants to take time to organize when you have time to make chalk art ha!
 
 
Don't judge my pantry.


I read somewhere that when you are doing chalk board art that you need to "prime" the chalk board first before you start, which is just taking one of the big pieces of chalk-turning it on its side and rubbing it down the board. I have no idea where I read that, but I did it to mine. Oh and FYI - it gets messy (see below), so make sure you have a vacuum or swiffer or wet cloth by you to clean up the residue.
 
 
I'm really not that creative so I pretty much copied someone else's chalk board that I saw off pinterest.

 
Nothing super fancy and my handwriting is not the greatest but it sure does make opening up the pantry door a little more exciting these days. It's the little things right?!
 
and then because I was on a chalkboard roll, I did something cute on our little chalk board by the back entry.

 
and that pretty much sums up my creative juices when it comes to home projects these last couple of days. I know lame.
 
BUT someone else was pretty creative here at the Rawson household and if you follow on IG you saw the barn wood table my hubby started working on last week and now it's finished and in our house (just for display).

 
It is so pretty!! If barn wood was my style...which it is not, I would keep it. I love barn wood stuff and I love it in other people's homes, just not in mine. This table though is gorgeous, rough cut, and sturdy.


We had barn wood in our barn (imagine that) that was left behind from when we purchase the house. Apparently we didn't have enough to do with other projects so he just decided one day last week to do a little project with that old wood and came up with the table design. The base is chunky and the table is obviously from real barn wood and not the faux stuff.


He put a few coats of polyurethane on it and it's ready to go. Like literally, ready to go- it's for sale! If you want more info, you can contact us via email.
 
We have more wood left over too so I'm sure he will be coming up with more projects in the future since this one turned out so cool.
 
That's what we've been up to, oh and we started spraying our basement ceiling white so deets on that soon too!
 
Thanks for reading and have a great week guys!


Friday, October 10, 2014

{ Let's Talk Exterior }


 The outside of this house makes me cringe. I know it could be worse and I try to remind myself of that daily hourly. One person told me they actually liked the color of my house, BUT not me. No thanks. 


 It's not just the color that makes my eye start to twitch, I get overwhelmed by the lack of landscaping and the abundance of weeds looming around the house. The attached rickety carport makes me nervous. The unwelcoming front cement steps and old wooden front door make me sad, the gross windows and surrounding trim are screaming at me to be replaced, the half dead and ridiculously too large pine trees that practically cover the front of the home from the road need to be chopped down- like yesterday, and the tiny, very dirty deck off the back of the house makes me wonder if my kids need their tetanus shots updated.  Am I being too picky? Maybe a little too dramatic! 


 I know, that was a mouthful but I needed to get out how much the exterior of this home makes me look forward to the day that it has more of my personality and likes to it. There's a huge difference to buying an old home that needs work and building our first home. I need to get used to reality, that results take work, time and money.  Snapping fingers and closing eyes doesn't work around here. There is SO MUCH that needs to be updated and changed. Pretty much everything in fact. And even though I just barfed up my horrible thoughts for you I have to say I am extremely excited to see this house evolve and change into the house that we feel like is home to us.

Waiting is hard for me. It's been ingrained in me that the exterior (and interior) of my home is a reflection of who I am. That statement is something I have tried to push down and out of my thoughts for years. It's especially hard for me being married to a "junk" hoarder (for those of you who know us know exactly what I'm talking about!) Granted, I DO try to keep my house tidy and strive to have my home be the best it can be BUT, I do NOT want to pass on the feeling to my children that the "stuff" that we have (our home, cars, clothing and such) is what gives us our value. So for now, until we can afford to make changes to the exterior, I am trying to be content with what we have. We have our daily bread, our immediate needs are met, so i have to remind myself of these things oftenDo you smell what I'm stepping in?  Does that mean I cant give a little shout out to what I hate? No, I don't think so, sometimes it feels good to get it out, doesn't it? So there, my thoughts are out and now I am looking forward to the future and the beauty this beast will someday become.


Realizing that the list of what needs to be done out here is long, all of which are very expensive changes, I decided to write it all out and show you some house exteriors that catch my eye. I'm doing this because it makes me feel like if I list it all here, eventually it will get done and I have something to look forward to. It gives me hope and it's fun for me to dream about what I really want. Plus when we go to make decisions I can refer back to this post. So here's me dreaming...

I want to add on a front porch, a little something like this below. I like the white railing and I love the front door. 


I love the look of shake siding on houses. The house below has great color choices and the combo of shake/horizontal siding looks great together. I think our color choice will lean less toward gray tones and more toward warm tones since the chimney is tan/brown in color.

Bellevue AU208A - Aurora Classic Ranch Modular Cape Model - with 9/12 Roof - dormers, shake & vertical siding and more!

I also really love vertical siding. If you didn't see my sister's home exterior in this post you can see that they did a combo of sidings which included vertical siding. It looks beautiful. So our future exterior may have vertical siding as well somewhere. 

I also REALLY love pergolas. I want to tear off the old tiny deck that we currently have and do a patio similar to what you see below. That space screams cozy to me. 


We are planning on adding a garage with breezeway attached to the house. Something small and similar to the photo below. Currently there isn't really anywhere to hang coats or store boots and shoes upon entering the house, so having the breezeway where we can have a large closet for coats and a place to sit down and put shoes on will be great.

Curb Appeal in a Month

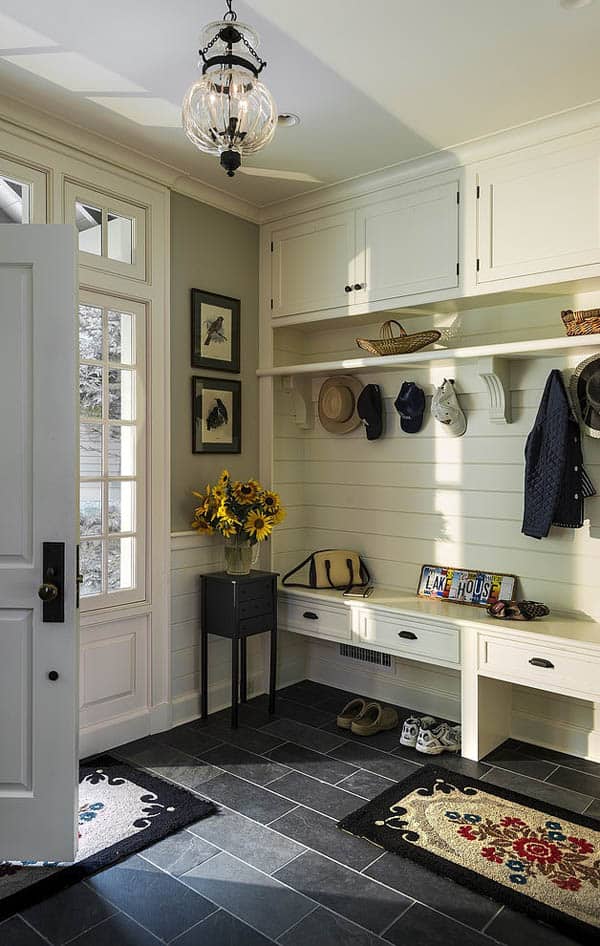
I imagine the interior looking something like the photo below. 

Lake House-Crisp Architects-22-1Kindesign

As for the landscaping, this house has a lot of weeds and plants all thrown in one big mess together. We did a little bit of landscaping last year on the side of the house but hardly anything to get excited about so next spring I am looking forward to digging up around the front of the house and changing it up drastically. 

I lean toward simple landscaping. Something similar to the look below. 

Simple Front Yard Landscaping Ideas | Landscape-Front Yard Idea's


Those are all good photos for me to look forward to when we are able to do some changes. Hopefully we will be able to start on some of these things next spring. I'm dreading the looming winter and usually become somewhat of a home body in the cold weather so it's good for me to have something to look forward to! 

Happy Friday and Have a great Weekend! Oh and don't forget, if you wanted to get a few things to kick start your Christmas purchases you can get some great discounts using PROMO CODES provided by some great Etsy shops from yesterdays post. So check it out! 


Thursday, October 9, 2014

{ Etsy Shop FAV's }


 I shop Etsy A LOT. It can probably be called an addiction if I am looking at it every.single.day to see what is new out on the site. I love handmade items. Plus by shopping on Etsy I am supporting small business and I love that. It's like going to a craft show every time I visit the site. If you haven't ever been to Etsy.com, you MUST go now. Literally you can find anything. Anything! And just so you know, I am not being compensated for saying these things, I just really love Etsy.
Because I love it so much I wanted to share with you a few of my favorite shops that I've been buying from lately or have items from their shops in my shopping cart just waiting for me to purchase.
Simply Made by Erin has seriously cute stuff! It's that time again to start thinking of fall and winter accessories and Erin has great items to add to you or your daughters closet. AND GOOD NEWS FOR YOU, Erin is offering a promo code to my readers only using the code RAWHOUSE15 for 15% off any purchases made up until Dec 31, 2014.

https://www.etsy.com/shop/SimplyMadeByErin


Just for Keeps shop has a lot of great printables and other items for sale. This stuff is one-of-a-kind and perfect for special occasions and celebrations!


I love the printable Christmas tags!


Evergreen Garden is a fantastic shop for turban and wrap style headbands. Headbands are IN right now and Evergreen garden is a great shop to pick up a great deal!


I have each of those in my cart right now!


Lisa's shop This and That Boutique is my new favorite place to get cute skirts at a great price for my girl! No lie, Lisa's stuff is adorable and QUALITY made!


I had my little peanut's photos taken last week and in this one below she is sporting This and That Boutique's skirt and matching hair bow. I absolutely love them! You can pick up some of Lisa's stuff today for an extra 15% off using Promo Code Harvest15!


Sage K and Co. These accessories are SUPER CHEAP and beautiful! I bought the necklace in the photo below. LOVE IT and wear it all the time. (Except for when I'm at work, doesn't really match scrubs ;))


You can get 15% off using promo code: FANLOVE15. Click here to see what deals they have this week!


Lastly, My most recent purchase came from the shop Club Rowdy.


They offer bow ties and ties for little men.
My little man is sporting one of Club Rowdy's bow ties from his one year photo shoot below. Cute right! Who doesn't love a chubby baby!


They were kind enough to offer 20% off to my readers by using the Promo Code: rowdy20


All these things would make great Christmas Gifts too so make sure to scope out these shops to get a great deal and get some of your shopping done early! I always say I'm going to do that but then I almost always am scrambling at the last minute!

So what Etsy shops do you guys love? If you have one to recommend, comment below so we can all check it out!