Showing posts with label kitchen remodel. Show all posts

Monday, June 22, 2015

{ Amazing Arabesque }

 
I am going to rap up the kitchen details all in one long post today since I am sure you are probably ready to be done talking about it and move on to something else, no?!
 
I literally have had SO MANY complements on the tile we choose for our kitchen. I know I said this before but truly I am IN LOVE with the kitchen and I think the biggest reason for the pure joy that I feel when I walk in there is that gorgeous beveled arabesque tile from Mission Stone and Tile.


This tile was generously provided to us by Mission Stone and Tile for the One Room Challenge that we participated in and I feel so blessed to be able to have their gorgeous product in my home.
 
 We started at the right end and worked our way up and then over. From there we filled in the gaps. We made a little video of how we attached the tile to the wall. You can see that post here.
 
I really was stuck on choosing what color grout to use and it really was helpful for me to paint the wall in my color options prior to putting up the tile. I mentioned this before in my post but honestly this is the BEST tip I would recommend if you are like me...aka...super in-decisive.
 
 
In the end, I knew the white was too plain, the dark gray was too busy and when I looked at the light gray, I heard angels singing, it was perfect! I know dramatic, right!?
 
Grouting is messy. Super messy but it only lasts a little bit and then you clean it up!
 
 
 The game changer for the whole look is when Mark filled in all the gaps, and edges with the caulk. If you didn't catch it in our reveal post, there was still a lot of caulking that wasn't completed yet. We just needed one more day and didn't have that but since then it's all been finished and it really completes the look, not to mention adding the outlet covers makes the whole project absolutely complete!
 
 
It wasn't hard for me to choose the style of tile that I wanted because I have been drooling over this arabesque tile. When I looked at Mission Stone and Tile's shop, I really fell in love with a few of their other options. If you haven't checked it out yet, make sure you click over to see their products.


A tile backsplash is a game changer for your kitchen, and for a small investment the improvement to your room is major!
 
The other project that we worked on that has really changed the function of our dining room. Fact is, our dining space is tight and cramped
 
Here is an old pic of what we were doing before.
 
 
 It's cute in all but to get into those chairs on the left side by the window took talent and coordination. They didn't scootch back and you really were trapped there until you were done because who wants to get in and out of that?!
 
Plus with the chairs back there we had to move the table further over toward the island which really made that aisle between the island and the chairs on the right side of the table very small. It was annoying to have more than our family eating at this table in this dining room.
 
Then we came up with the idea of the bench!
 
 
 Literally we use this bench every.single.day. My little guy prefers sitting on the bench to eat his meals and it's perfect for lining up a bunch of little butts when we have extra kids over.
 
The best part is, we can fold it down when we need more space!


Those little X shaped legs have hinges on them and fold right up into the bench so that it lays flat against the wall.
 
 
 We can push the table up to the windows and gain a lot more room. Those curtains really soften the room too. The whole thing turned out SO much better than I anticipated!


 So that's the last of the details on the kitchen update. If you happen to see something and have questions, please drop a comment and I'll make sure to give you the best details I can!
 
This room is truly the heart of our home and if you can remember again how it looked when we first looked at the house...shiver because it was bad...it's unbelievable sometimes that it's the same room to me!
 
How about a quick reminder??


 So much better!
 
 
 Thanks for sticking around through this whole kitchen update! I'm ready to show you a few more things I've been working on around the house lately so stick around, I promise it wont be kitchen posts for a bit anyway!


Wednesday, March 26, 2014

{ Cabinets Are Back }

The cabinets have all been put into their new places in the kitchen. These guys have been  all over the house and beyond. 

Initially the doors were taken off and put in the barn for sanding and priming. (Yes, that's grass in that photo below. I hardly remember what the stuff looks like since we are having the never ending winter here in Michigan this year)


While the doors were drying, I went back inside and applied one coat of primer to the cabinets. 


Then they were completely removed . We relocated them all over the house depending on what room we were working on at the time. They've camped out in the living room, the nursery, our master bedroom, and now they are finally back where they belong - in the kitchen!


If you follow me on Instagram @kaseyrawson you already saw this photo. The base cabinets were put in first. 


The arrow is pointing to where the dishwasher will be. The flooring didn't go all the way over because we knew we would have that wall lined with cabinets but we have extra flooring that will go down in the gaps where the stove and dishwasher will be, it just isn't in yet. 

Mark just put the uppers back in last Saturday.


There's a very small gap between the upper on the left and the wall. I'm still debating if I want to do a few small open shelves for cook books and such or if I want to have a filler piece of wood placed in there to close it off. I'm leaning more on the filler piece than the shelves but who knows, these days I change my mind a million times before making a decision.


It's exciting to see the kitchen going back together. In the scheme of things, this is a small accomplishment but each small step leads to a finished product and for this I am happy. 

I still have to prime a few spots. Since I primed while they were still on the wall a couple of the sides didn't get done yet. I bought the paint for the cabinets on the wall. So I am hoping to fit that in very soon. As for the island, I'm going to paint it grey. Have you guys heard of Cabinet Transformations? My friend had purchased a kit and ended up not using it, so she gave it to me. I am looking forward to trying out this kit. There's a lot in the box even an instructional DVD, so I'll be watching that soon to learn all about how to use it. I'll be sure to post my thoughts. Have any of you guys used Cabinet Transformations? 

For the sake of before and after comparisons the kitchen is looking a million times better than what we started with!


Lots to do in here but it's getting closer and closer! Next up after painting will be the counter top installation, after that new sink and faucet, and after that we can move our appliances back in! Sounds so easy right?!

Saturday, February 1, 2014

{ Mess, Mess, Mess! }

You know the saying, "It gets worse before it gets better"? I am confident that is ringing true for us in all ways possible. There is never NOT a mess at this house! Between the drywall mud and dust, the kitchen floor being ripped up, the bathroom demolition, and now the window removal in the kitchen we live and breathe mess in this joint! Check out this fabulous pile of old insulation from the wall near the window. Y.U.C.K.


So remember this awkward moment when we had two windows practically side-by-side?


Well we amped up the awkward-ness. Check it out now


Be jealous, be very jealous! 
Not only do we have two different siding colors and rotted wood up there but now we have a big piece of wood covering the hole where the window used to be. 
Don't worry neighbors, it will get all new siding as soon as the weather improves! It kinda looks like it's getting trashier out there but I promise, "it gets worse before it gets better" remember?! 

Here's how the inside was looking after Mark removed the old plaster. 


Then this happened


He is framing it in for a doorway to be there when we do the breezeway and garage addition. For now we will just have it framed in and drywall covering it until we do the addition. Which is hopefully going to happen later this year. The timeline on everything has to be pushed back a lot further due to having to spend way more on the renovations than planned, so we are unsure when things will happen but hopefully this fall we can start on the garage. 

In other news...painting has officially began upstairs so with my fingers crossed I am hoping to show you that by the end of next week!

Have a fabulous super bowl Sunday tomorrow!!

Friday, December 27, 2013

{ Good-bye Stinky Vinyl }

We hope you all had a wonderful Christmas! 
We enjoyed lots of family time which is rare these days. We got to spend time with Mark's family and my family and even had a little of our own family time too on Christmas morning. 
Here's a quick shot of us all in the morning in our pj's.


We've been jumping all over the house this week, from one project to another...sometimes in the bathroom, sometimes upstairs, and currently we are working in the kitchen. 

Recently Mark removed the bulk head that was above the old cabinets, he took down the beam that stretched across the kitchen and put it up into the rafters so that the kitchen ceiling will be all the same height.  He also installed a new window in the kitchen and ripped up the old vinyl flooring too. 

Here's a reminder shot of the kitchen before the beam and bulk head were removed


The beam was placed there because that was where the original house ended, so when the tiny kitchen edition was put on way back when they had to put in the beam for support. I didn't even know it was possible to raise up a beam but Mark is a genius and did it in a couple hours. 

He had to put up a temporary wall to hold the weight while he removed the beam and reworked it back up into the rafters. 


He tore apart the ceiling to open it up for the beam to be put into place. 


Next up was the window installation.
See the old stove vent in the photo below.
That came out and the window went in it's place. 


We put a window here because this will be directly above the kitchen sink. As you can see below now there are two windows close together but the old window is coming out and there will eventually be a door in it's place when we do the breeze-way and garage addition next year sometime. 


The temporary wall was removed and we decided it was time for that gross vinyl flooring to come out. 

Need a quick reminder of that beautiful flooring?!


Trevor was daddy's big helper for this particular project.


The wood flooring was under the vinyl just up to where the edition was so we are hoping to be able to salvage as much as that as we possibly can. It's in pretty rough shape as you can see in this close up shot but we'll see if we can do it.


Mark worked on ripping the floor up, I brought everything to the dumpster and Trevor pulled up most of the nails with the pry bar all by himself. He is such a good helper!

 
This is how it looks now, all cleaned up!


We have a little work to do before it's ready for new flooring. I have to mention too, although I don't have any photos of them, but Mark's dad has been working very hard on getting all the electrical done in this room (and everywhere else). Including all new outlets and new can lights in the ceiling. 

It is looking great and it feels so much better in there already with that old flooring out. 
I still haven't decided what to do yet in there...not sure if we want to go with a vinyl flooring or try to find a similar hardwood to match the original hardwood as best as we can. 

What do you guys think? Is is easy to match up old wood with new wood? 

Thursday, November 14, 2013

{ Kitchen Progress }

Remember when I said I was hoping to finish priming and maybe even paint the kitchen cabinets? Well...the painting didn't happen and the priming was done for a minute but then I removed the cabinets from their places and was reminded the sides of them still need to be primed. But hey, I felt really accomplished for a minute! 

So here's some quick snaps of the primed cabinets


Then one night when I decided I should remove the cabinets so we could move them to where we wanted them to get a better feel for what we are working with. 

I really didn't even know where to start. I thought I could just start unscrewing and things would come apart. I forgot the counter top was holding it all together duh! So Mark gave a quick lesson on removing counter tops and I went to town. I had to remove the laminate surrounding the outside edge so that half inch or so wooden boarder could be pried off. 


From there it was just a whole lot of yanking and finally it was gone.


Next up was separating each section from each other and the floor. Again, a lot a prying to get that to happen. Mark helped remove the plumbing when it came time to do the one that the sink was in. 


It was there one minute and gone the next. We were left with some pretty nasty gunk underneath the cabinets too. Yay more grossness to clean up (sarcasm here). 

I was really trying hard to carefully pry those apart since we are planning on re-using them but I had a few oops spots. The good thing is that nothing that got damaged will be noticeable once we are done. 


Bottom ones are gone


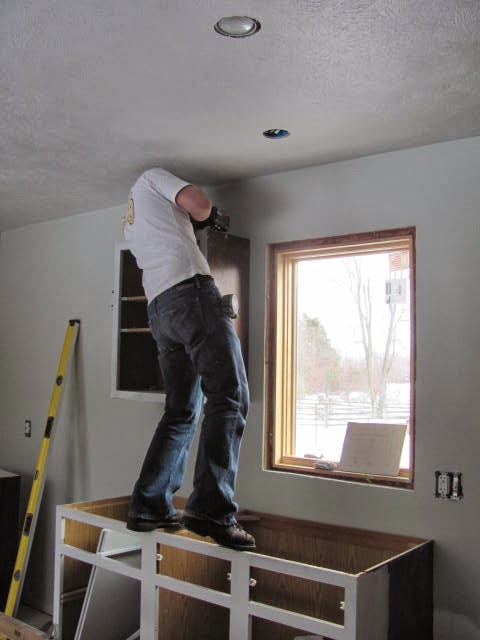
Working on removing the uppers


Here is how it looks now. 


I moved them a million times to figure out exactly where they would work the best. We weren't sure if we would have room for an island but we decided we are going to make room. We took a trip to IKEA and purchased this table. It's a long, skinny table so hopefully between the island and the windows it wont be too tight. If we didn't do the island we would have only 5 lower cabinets, two of which are under the sink. Not cool. So thats why we are going with it. Crossing fingers that it all works out once its installed and everything is moved in. It will be cozy but thats ok! 

Here's a quick side by side for the progress up to this point. What do you think?!


So thats as far as we've gotten on the kitchen. The drywall upstairs is in progress still so when thats done we will start on the main floor and then the kitchen and bath will have a lot quicker changes happening then!