Showing posts with label kitchen. Show all posts

Saturday, May 23, 2015

{ Deets on the Plank Wall }

Man, time sure does fly by, huh?! I meant to get this post up last week about the plank wall but my side biz has been busy, which is a great thing but not so great when I don't have time to spare to hop on the computer to get these posts up! If you didnt read my last few posts, we participated in a one room challenge (click that to see our reveal post) hosted by Linda from Calling It Home. She does these twice a year and it really gave us a kick in the butt to get our kitchen to the point that we I really wanted it to be! 


I wanted to start with the plank walls since we've had SO many emails, comments, and questions even when people have stopped in to see the room in person. First off, as if I didn't already say this a million times now I'm going to say it again, I freeeeeking LURVE these walls. It adds dimension to what was previously a plain wall and it makes the room feel a lot larger. 


Let's get to those questions though...

What kind of wood did you use? 

We used 1/4 inch HD (high density) board. We tried the 1/8 inch board initially but it didn't have enough depth so we went with the 1/4 inch. They were $13 for a 4x8 sheet. We needed 3 sheets for our two walls. 


How did you attach it to the wall?

We used a stud locator to find where the studs were and then used an air nailer to nail the boards to the walls at the studs. We didn't use glue (as some people do) because if I were to change my mind about the planks and want them removed, using glue would ruin the drywall behind the boards and make a lot more work to get the drywall back to looking good (which now I can 100% say these planks aren't going anywhere!). The 1/4 inch board is pretty light weight so using the nails is sufficient enough to hold the boards in place. 


Where did you start?

Mark started at the top and worked his way down. The most important thing is to make sure your boards are level. NOT that they are in line with your ceiling because more than likely your ceiling isnt 100% level all the way across. So start with the top board and make sure to get that one level all the way across. Caulking the ceiling after you paint will fill any gaps and make it look perfect. After that you can work your way down and keep checking the level with each board. Wonky boards would not make a pretty room!


What is the width of the boards?

Mark ripped the boards with the table saw into 6 inch planks. I read A LOT of plank wall tutorials before we started and this was the measurement most people went with. I think it's perfect but really it's all in what you think looks best in your room. 


Did you do any sanding?

After I spackled all the nail holes (which really didn't take that much time) I used a block sander and went over the whole wall twice. I took the vacuum hose and vacuumed along each gap after sanding because it got really messy. This whole process went pretty quick and I think made it overall look better. Make sure you cover your kitchen utensils if you have any out or you will be washing everything to get it clean again. Speaking from experience. :)

What color white paint did you use and what was your painting technique? 

I painted a coat of Zinsser Fast Primer and then did two coats of Dutch Boy brand white paint called Delicate Pearl in a semi-gloss finish. I choose that color since it's the same color as the trim in our home so it matches up perfectly with the surrounding floor and window trim. 


My technique for painting was to paint the gaps and the edges with a brush and then rolled on the rest. 


I would say overall this wasn't a difficult project. It took about 3 after work nights to get all the boards up on the wall. If we did a wall with out windows or a door and didn't require so many cuts then it would have gone a lot faster! The priming/painting took me three days to do. That includes filling in the holes. 

It's a relatively cheap room update as well. I think for the effort and cost it was WELL worth the beauty!!


Items we used + break down of what we spent:

boards (3 sheets at $13 ea) $39
table saw (we already had)
air nailer + nails (we already had)
spackle (we already had)
block sander (we already had)
primer (we already had)
paint $12 (after rebate)
paint brush (we already had)
paint tray liner $0.69
paint tray (we already had)

Since we already had so many of the items (which are pretty common home improvement items that most people have on hand anyways) this project cost us under $52 to do and about 6 total nights worth of work. 

So what do you guys think? Plank walls aren't anything new but in our neck of the woods it seems like it's something we don't see very often and I am here to tell you if you are good with a tape measure, level, and have a few nights to spare you can get this same look in your house for pretty cheap!


Let us know if you have any other questions! Next week I will share details on that GORGEOUS tile back splash of ours...cant wait to share because this tile is truly so beautiful!! 


Thursday, May 7, 2015

{ One Room Challenge | REVEAL DAY! }

First off, I have to start by saying THANK YOU to all of you that have left such sweet comments on all of our projects each week + Thank you for taking a little time out of your day to see whats happening around our house!

IT's REVEAL DAY!! I've been so excited to share these photos with you. I must admit we still need to finish a few last minute things, I thought six weeks was no big deal but one more day would have been helpful for us (coming from the biggest procrastinator on earth...I always need one more day ha!) 

So disregard the few things that still need finishing...I'm not even going to mention what they are...you know what they say, what you don't know cant bother you...or maybe I just made that up. Whatever, it works for me. I know you are all just stopping by for the photos so I'll just stop here and let you enjoy! 


All of the beautiful images were taken by my amazingly talented friend Sara from Kety Studio! 


Here is the bench with X shape legs! I love this bench and it works perfect in our small space.

The legs fold in and the seat part lowers to allow the table to be pushed back against the windows when we don't need the extra seating that the bench provides. 


 I LOVE walking into this kitchen!


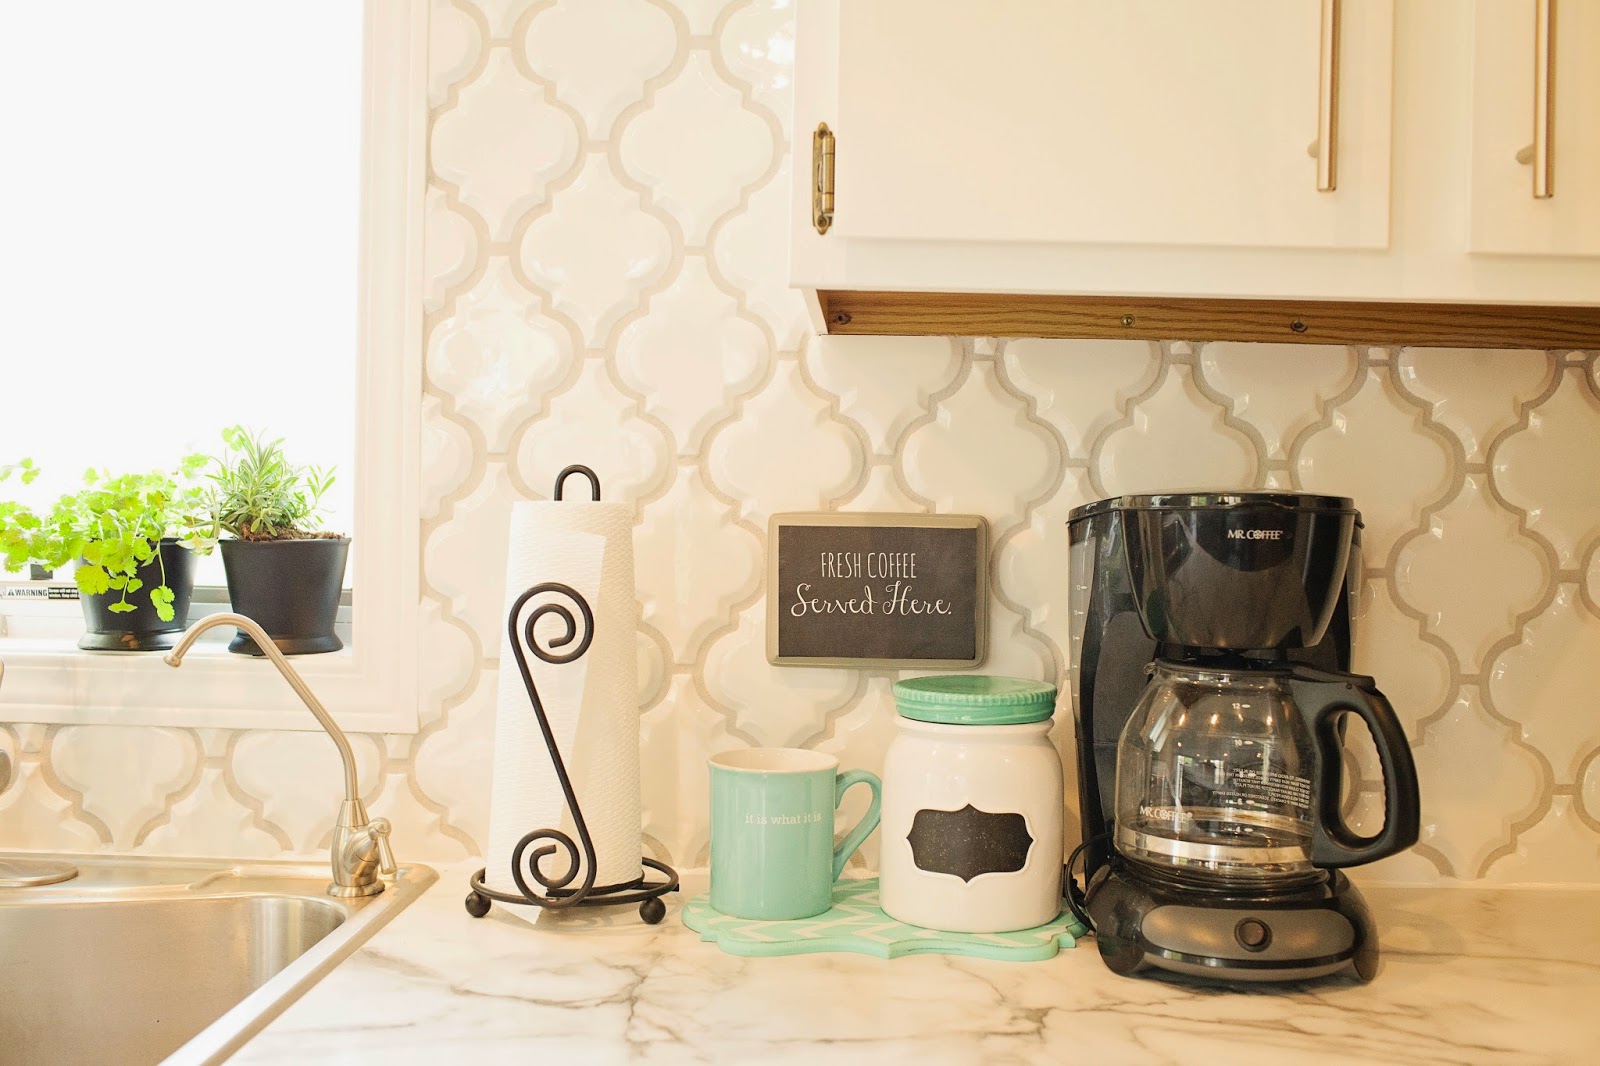
 This amazing tile was given to us for this ORC by Mission Stone and Tile. You can find it and all their other awesome choices on their website here! 


This kitchen is the prettiest room in our house and I want to do these one room challenges for each space that has yet to be touched, although I have to admit my sanity and my family's happiness or our budget for that matter would probably not survive ha! But with that being said, I LOVE how this room has changed in just 6 short weeks. When people say the kitchen is the heart of the home , it is very true for us. We do life in this kitchen and now we get to enjoy it all the more with the finishings that we have completed in these last six weeks! 

and just to leave you with reality check of our life, do not be fooled by the "put together" look of our kitchen, it literally only looked that tidy for the 20 minutes it took my amazing photographer and friend to photograph the room and meanwhile this is what our living room looked like with all the tools and junk that needed to be removed to allow you to truly take in the space in a pretty way


this is life! 

and because we all love a good before and after...these are from the day we bought the house till today. In one year this room has evolved into home for us!


and this is the comparison from 6 weeks ago. It was a nice kitchen before but the finishing touches make is all the more better!


Thanks again for stopping by! If you haven't had the chance to check out each week of the #oneroomchallenge you can see all the past weeks below. 

If you are new to the Raw House Project Blog and want to get a quick look at our house tour you can see that here!


Thank you Linda from Calling It Home for allowing us a space to share our home and for giving us the kick in the butt to get it done with a time limit! Visit all the amazing blogs that participated in the challenge here and here to see all the jaw dropping room reveals!

Wednesday, April 29, 2015

{ One Room Challenge | Week 5 }

Week 5...how did this get here so quickly?! 

This week was crazy but Mark did get most of the tile on the wall (insert happy dance!)


This tile. 
It is gorgeous just coming out of the box and up on the wall it is PER-FECTION!  

If you are just stopping by for the first time, so happy you are here! 


Thanks for taking a minute to checkout our ORC week 5 post. You can play catch up here for week 1, week 2, week 3, and week 4 if you are wondering how we got to this point of the challenge

This challenge is hosted by Linda from Calling It Home. The challenge is to take one room in your home and give it a face lift in only 6 weeks. These past 5 weeks have been really fun AND extremely challenging for us. I like to share about our house updates and since we've got this old home that needs a makeover of every square inch it's a great outlet for me to journal about our progress crazy life. It's been fun because I love seeing how a space changes even with just a can of paint, into a room that feels more like me, more like home, and something that I love. It's been challenging because we really don't have a lot of time. Like everyone, we are busy. If this was our day job it would be a lot easier but we both have jobs and the kids seem to always need something ha! Life happens. So we sneak in a little work here and there in our spare time! 

Because we need to work on our projects a little at a time, Mark went a little unconventional when it comes to setting the tile but honestly I think it's pretty genius what he ended up doing!


If you are unable to see the video the short and simple version of what he did is, instead of using tile adhesive that you spread a thin layer across the wall in small sections due to the fact that it dries pretty quickly, he used an adhesive called power grab. Applying it on each piece of tile and sticking each piece up individually as he went.

We also opted to not use spacers while setting the tile. Due to the arabesque shape of the tile it was difficult to use spacers...we tried, and each tile is slightly different so because of this we decided to eye ball each placement using approximately a 1/4 inch gap between each tile.

We still have a small section to complete and then we will be moving on to grouting. I'm having a hard time deciding what color grout to use. One really great benefit of using the power grab is we could paint the wall prior to putting up the tile so I could get an idea of what the tile would look like with different colors behind it. This was the genius part. To be able to get an idea of the color grout by looking at the wall color behind it is easier to make a final decision.
 I have the hardest time making decisions, choosing grout color is no exception. oy! 

I painted a little section of white, a little section of dark gray, and then the original wall color is a light gray/green...


So here are my choices after the tile was applied


Opinions on grout?

Last week I still wasn't sure what legs we were going to use for the bench Mark made but I had an idea pop into my head that was altogether different than what I was originally thinking. I tried finding something similar online but I couldn't find exactly what I had thought up in my mind, so I asked Mark if he thought he could make them. He made them and they are exactly.what.I.wanted. 

A quick sneak peak before the big reveal next week is up on Instagram!

Here we are one week to go until the big reveal and we still have to finish installing the tile, grouting the whole back splash, complete the bench, CLEAN, and accessorize. Oh I forgot to mention, the curtains I ordered from Joss and Main came the other day and they were the wrong color. boo. I had to return them and the color I had wanted was no longer available so I will be crossing my fingers to find something in time for next Thursday! 

Don't forget to check out all the other awesome ORC posts here and here for this week. Make sure to stop back next week for some eye candy when all of us show off our newly re-done rooms!


One last thing before I sign off this post...my cousin Kyle was involved in a very serious work accident last week and is currently in the hospital fighting for his life everyday.The power of prayer is being felt by all and I just ask, if you could take a second to send up a prayer for his body to heal and for his family to stay strong through it all, it would be a huge blessing. Thank you and blessings to you. 


All of the beautiful tile was provided by Mission Stone + Tile, all my comments regarding the tile are 100% my own opinions and clearly...I am in LOVE <3 font="">

Thursday, April 23, 2015

{ One Room Challenge | Week 4 }

I'm a little late to the party today (actually I'm always late so this is quite fitting) because I was waiting for the tile to arrive and it's finally here! 


This is week 4 of the #oneroomchallenge hosted by Linda from Calling It Home. I wanted to join the challenge for two reasons. First I wanted the kitchen to have the finishing touches that I've been thinking about since we bought the house and this was a great excuse to start that. Second because I love working side by side with my husband doing projects. It's fun talking about what our plans are and coming up with ideas on how to execute them. He is literally an amazing handyman and knows how to pretty much do everything and always helps me make my visions come alive.

ok enough of the sap...

I was hoping the tile would have arrived earlier but with some unexpected delivery issues it only just arrived but I can tell you THIS tile will literally MAKE my kitchen. I am excited to see it go up on the wall. 


When I saw this pull up in front of the house I got all giddy and then realized I had to help the guy unload the truck lol. It wasn't so bad.. our kid's wagon made the work easier getting that 250 lbs of tile to my door ha! 

Last week I wasn't sure what legs I wanted on the bench and to be honest, I'm still not 100% sure what I want. I'm leaning more toward the hairpin legs and if we're being truthful, I don't think that I will decide until the very last minute because for some reason I am the worst procrastinator ever. Thankfully its one of those things that its ok to wait on. 


Here is how the kitchen is looking this morning


The planks are painted and caulked. I walk into this kitchen everyday and smile. It is such a pretty room and the planks make it feel so warm. 


I purchased some curtains and am waiting for those to arrive. The bench needs another coat of paint on it and the legs and then we can check that off the checklist. The tile will get started this week. The island will get a touch up of paint and I was considering adding one more project to Mark's list with adding under cabinet lighting. We'll see how fast we can get the tile up and grouted and then if we have time I would love to have the extra light in here. I love the look of under cabinet lighting.  

Can we talk for one more second about the tile? 


This tile is from Mission Stone and Tile  and it's called Beveled Arabesque. I have been planning my kitchen in my head and on my pinterest boards forever and THIS is the tile that I have always gone back to when considering what to use. I debated doing the classic subway tile for a bit but doing something a little different was exactly what I wanted and this arabesque shape is perfect. I never had a tile back splash. In our first home that we built we didn't do tile. None of the bathrooms have had tile back splash so this will be a first for me. Can you tell I am freeking excited #thethingshomeownersgetexcitedaboutisridiculous but I'm ok with it lol! 

Stay tuned for next week because you'll finally get to see how the tile transforms our kitchen from plain to perfect (in my opinion anyway ha!) 

If you are just joining and want to check out the other people that are participating in the One Room Challenge linking up here you can check them out!

Thanks for stopping in...until next time! 


Thursday, April 16, 2015

{ One Room Challenge | Week 3 }


It's week three and I have to admit that we are struggling when it comes to working in the kitchen. Like hardly got any work done this week because the weather has been so beautiful struggling. Doesn't really sound like it since we've been outside accomplishing projects like yard work and cutting down super large pine trees in the front yard but the kitchen has been suffering slightly. 

All is good though. We are actually doing really great with our time line so a light week of work isn't really putting us back on the overall project. 


I should clarify a little, it was a light week of work in the kitchen for Mark. I on the other hand spent the better part of two days priming and painting the plank walls. The above photo was taken just after I finished priming the corner of the room. 


These photos are so bad but you can already see how the paint is transforming those wood planks to pretty planks. The white paint and caulk really changes the whole look of the planks and I cant wait to show you that in the reveal. I honestly dont know how it took me so long to do a plank wall because seriously I overly love it. overly. ha!


The other project that we can almost check off our list is the bench. 


Here it is before we painted it. The nail holes were filled and I was ready to give it a good sand down. It doesn't really look like a bench above because the amazing thing about this bench is that it's collapsible!

Here is how it looks when it's up.


I'm still looking for some legs that we can attach to the bottom side. I just propped up the bench in the above photos to give you an idea of what it will look like. Here are a few of my inspiration photos when it comes to bench legs. Totally different options but I really love both benches so we'll see what I can come up with. 


What is your vote? 
Hair Pin Legs vs. Clear Legs
Give me your opinions!!
Here is a reminder of our table and our clear chairs for reference.


You can also see why having a collapsible bench will be great in this small dining room of ours. We usually have the table pushed right up to the window so with the new bench it will allow us to continue to keep our table pushed against the windows but when we need the extra seating for guests we can pull out the table and set up the bench. #perfect. 

I started priming the bench and hopefully by the end of the weekend it will be all painted. 

I made a couple cute pillow covers and because I cant help myself, when I propped up the bench, I had to add the pillows to envision it all pretty with some fun fabrics. 


I'm super excited to be able to have this bench option for extra seating! I will be sure to share all about how we Mark built the bench and once we get the legs I'll be sure to let you in on how he rigs those so they will flip up allowing the bench to move up and down the way we need it to. 

It was probably nice that Mark took a week off in the kitchen because this coming week he has LOTS to do including finishing up the plank wall and starting the tile backsplash! eeeek!! 

If you are just joining us for the first time you can check out how our #oneweekchallenge started here in 

To see all the amazing bloggers out there that are also participating in Calling It Home's one week challenge you can click here! The link party for week three is here and there are over 150 amazing rooms that are getting a makeover so if you are like me and addicted to house photos and internet inspiration make sure to check this page out too! 

Until next week, Be Blessed.